The quick and easy way to lay a slab terrace on adjustable pedestals
A terrace is an ideal outdoor space for enjoying the sun, relaxing and sharing convivial moments with family and friends. If you’re planning to create a slab terrace, YEED adjustable pedestals are an excellent choice to ensure a solid, long-lasting installation. In this article, we’ll take you step-by-step through how to install a slab terrace on adjustable pedestals simply and efficiently.
The benefits of pedestals on slabs
There are many advantages to building a terrace on blocks:
- First of all, this system makes installation quick and easy, as it avoids traditional masonry work such as pouring a concrete slab. So you can enjoy your new terrace more easily!
- Adjustable pedestals can also be easily used to renovate an old terrace.
- By adjusting the pedestals, you can easily correct any irregularities in the ground, guaranteeing a flat, stable surface.
- What’s more, this type of paving facilitates access to networks located beneath the terrace, such as electrical cables or water pipes, simplifying maintenance.
- In addition, air circulation under the slabs ensures that the terrace is better ventilated, preventing moisture problems.
- Finally, this system offers a wide variety of finishes and materials to create an aesthetically pleasing, durable and weather-resistant terrace.
Choosing the right tiles
Choosing the right tilesBefore installing a tiled deck, it’s essential to select the right tiles, taking into account a number of essential standards to ensure the durability and sturdiness of the outdoor equipment:
- The classification of non-slip coverings in wet environments for bare feet must be at least class B, while for shod feet, it should be classified R10 or R11, especially near a swimming pool
- Abrasion resistance is assessed by the PEI standard, on a scale of 1 to 5, where a higher number indicates a better ability to resist passage.
- Resistance to water, chemicals and wear is measured using the UPEC indicator.
- To assess a tile’s scratch resistance, consult the MOHS scale, graded from 1 to 10, indicating vulnerability to scratches, from the most fragile to the most resistant.
Terrace tiles need to be non-slip, hard-wearing and easy to maintain. In this respect, porcelain stoneware tiles are often the optimal choice, combining durability, aesthetics and an appearance similar to that of rustic materials such as stone or wood, without the constraints of maintenance. There are two types of porcelain stoneware tiles: full-body and glazed, also known as ceramic tiles.
Step 1: Planning and preparation
The first step in any terrace project is to plan and prepare the site properly. Make sure you’ve chosen the ideal location for your terrace, taking into account sun exposure, access from the house and integration with the rest of your garden.
- Before you begin, it’s essential to plan your project carefully.
Determine the location of your deck and make sure the ground is level. If your new terrace is to be built on an existing concrete slab or deck, there’s no preparation to be done, since the surface is already stable and level. If you’re laying your deck on unprepared ground, however, you’ll need a stable, loose surface. See our article “How to prepare the ground for the construction of my terrace on pedestals”. - Take slopes and angles into account when deciding on the number of pedestals required. Please refer to our “adjustable pedestals calculation table”.
- You’ll also need to draw up a plan for your deck: this is commonly known as a layout plan, and involves precisely defining the shape and dimensions of your installation. This will enable you to define the quantity of products and materials you’ll need for your wood deck. A little tip for layout is to make a plan to scale, defining the surface and what you want to put on it. To create the layout of your deck, take into account the shape of the house, as well as the heights available at door and window thresholds. In this way, you’ll be able to define the quantity and size of pedestals to use.
- Choose a compatible covering: Laying on pedestals requires the use of a covering with a minimum thickness of 2 cm. It is possible to use 20 mm-thick tiles (porcelain stoneware) and some 50 mm-thick natural stone slabs.
Step 2: Ground preparation
- Once the location has been determined, it’s essential to prepare the ground to ensure a stable base. Start by marking out the surface of the terrace with stakes and ropes. Next, loosen the soil to a depth of around 10 to 15 cm to remove all undesirable vegetation and materials.
- Add a geotextile to prevent weeds from growing upwards, while allowing water to drain away, thus ensuring the longevity of your terrace.
- Cover with crushed gravel
- Compact to create a flat, stable surface
- Check surface flatness with a spirit level.
Step 3: Installing YEED adjustable pedestals
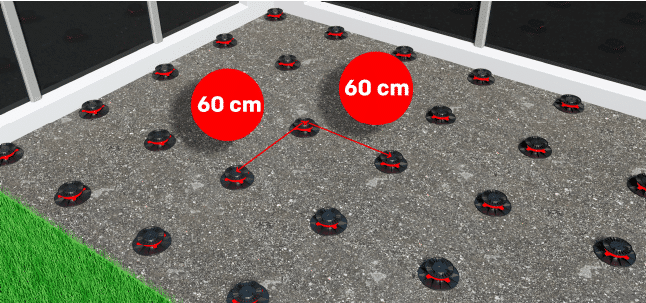
- Define the number of pedestals per slab.
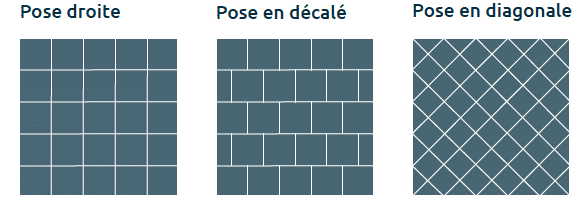
The number of adjustable pedestals required depends on the size of the slabs used. You can use the pedestals calculation table as a guide, and our recommendations for laying the slab using the diagram below, which you can also find in our slab installation guide.

- Then place the adjustable pedestals on the surface.
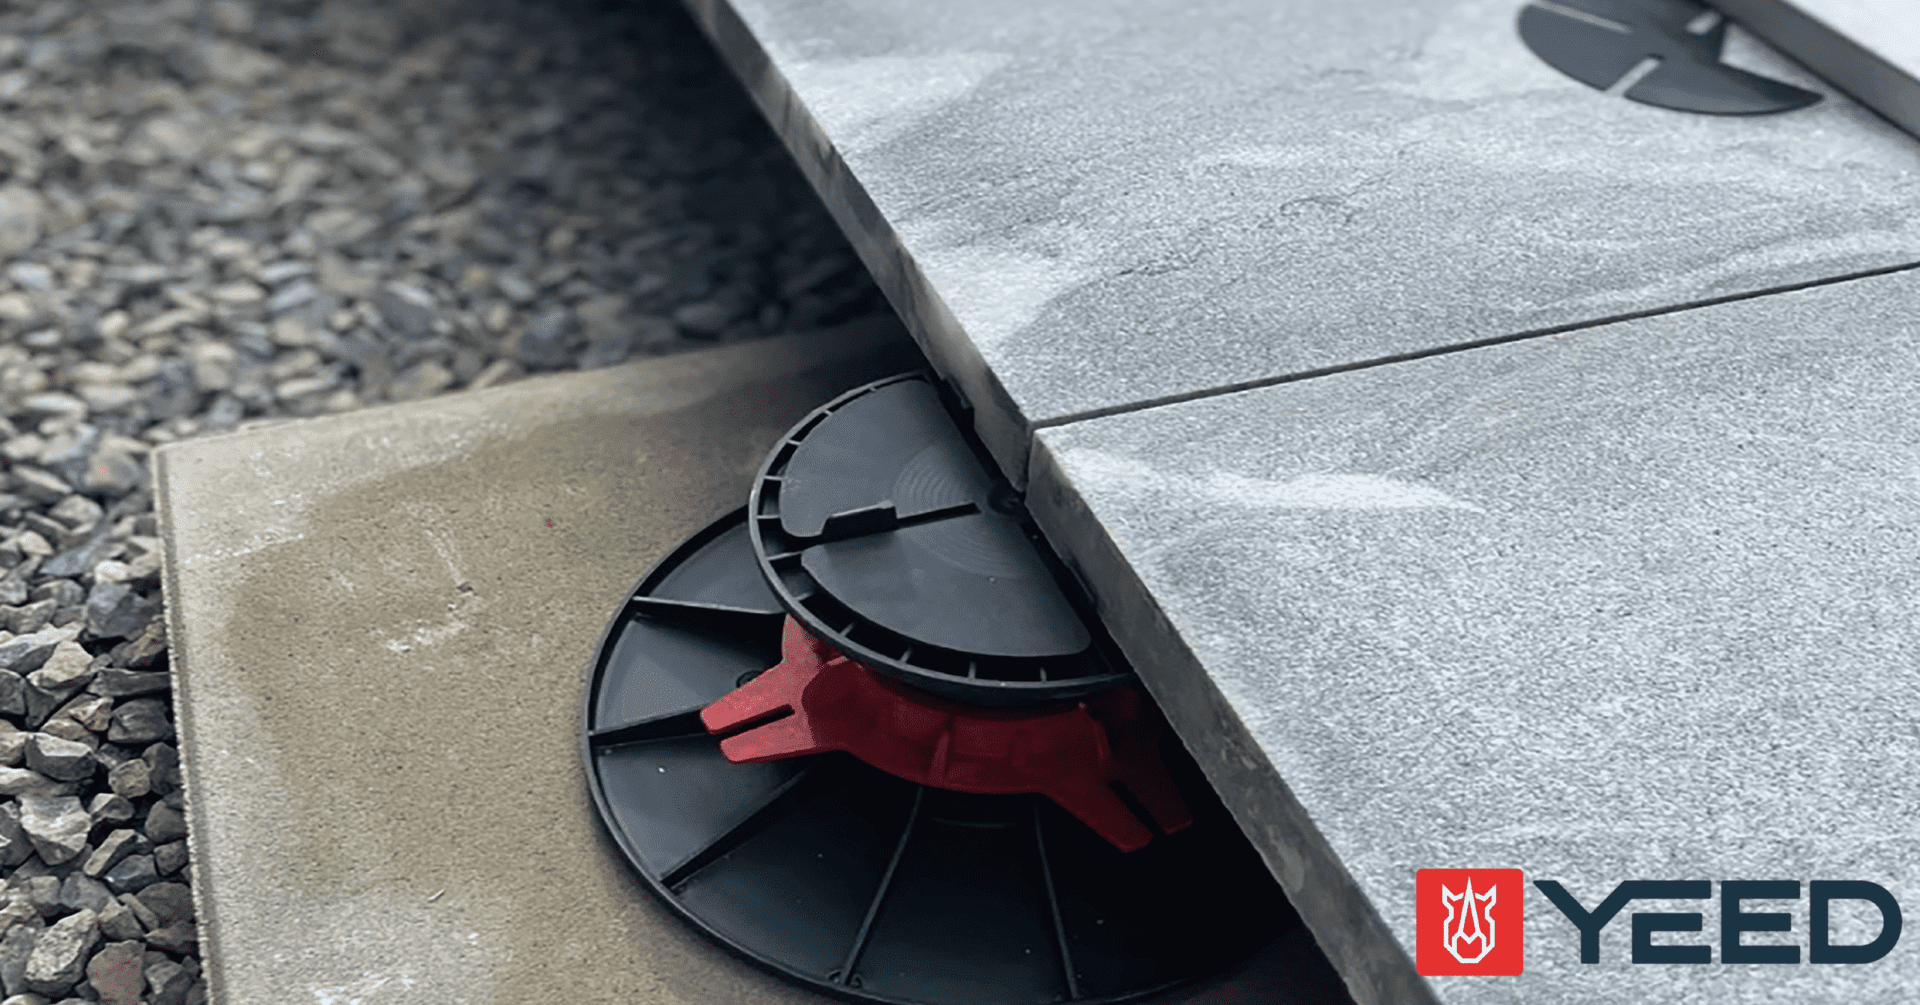
YEED adjustable pedestals are the key to the successful installation of your flagstone terrace. Place the pedestals at the intended support points, ensuring that they are correctly aligned and level. You can adjust the height of the pedestals using the integrated knobs, to achieve a perfectly flat, level surface.
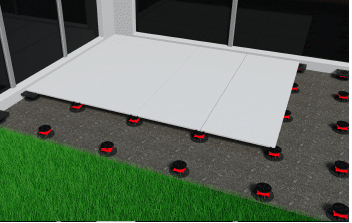
Step 5: Laying the tiles
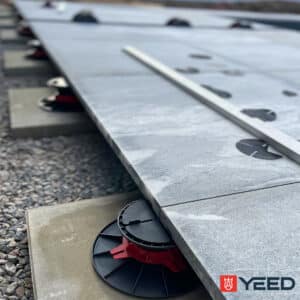
Once the adjustable pedestals have been correctly installed, it’s time to lay the slabs on the terrace.
- Start by placing the slab plate accessory on the perimeter pedestals and against the walls, then place the cushioning wedge accessory on all the pedestals and slab plates.
- For adjustable pedestals in wall corners, remove the 2 lugs on the slab plate.
- Place the slabs around the perimeter and check that they are square, to make it easier to lay the remaining slabs.
Continue laying the remaining tiles, stopping before the last row of pedestals.
- Each time a tile is installed, check its position using a spirit level.
- Install side fasteners: For end-of-deck pedestals, use the YEED ClipSystem. Break off the 2 pedestals and clip on the top clip, then clip on the bottom clip below the pedestal base.
Tip: to install the YEED ClipSystem in a lateral corner closure, break off the 4 lugs of the head of the pedestal and superimpose 2 top clips in a criss-cross pattern.
Step 6: Finishing and maintenance
- On the ends of your terrace, slide the side tiles between the YEED ClipSystem’s top and bottom clips. This provides an attractive, virtually invisible finish.
- Lay the remaining tiles and finish tiling the terrace.
- To preserve the appearance of your terrace and prevent slipping, don’t forget to :
– Clean the covering regularly with a stiff broom, water jet or high-pressure cleaner.
– Maintain with appropriate products (anti-foam, protection and waterproofing, etc.) to extend the time between cleanings.
Step 7: Enjoy your new terrace!
Congratulations, your slab terrace laid on YEED adjustable pedestals is now ready for use. All that’s left to do is install your garden furniture, add a few flower pots and some lighting, and enjoy this outdoor living space to the full. To install a wooden deck on adjustable pedestals, take a look at our dedicated article!
By following these simple steps and using YEED adjustable pedestals, you can be sure of creating a durable, aesthetically pleasing and perfectly level deck. So get started on this exciting project and enjoy the warm weather in your new outdoor relaxation area!